Showing posts with label patterns. Show all posts

Sunday, 4 January 2015

less blue hands, more green fingers

A friend requested that I addressed the problem of her hands being cold so I spent the weekend making glubs...
 these are the ones I've made for her
 ...but then my hands got jealous so I made me some too ...
 Not my pattern, so not for sale/order.
The pattern for these is from here
Sweet pattern. It's in US terms, but well written and with plenty of photos for guidance :)
(I went off the pattern a bit with mine and made them a little bigger and changed the thumb slightly on the second pair)

Oh, and the green fingers?...
...every year I say I'm going to start my tomatoes off earlier and forget...
...fingers crossed they don't all just die now at the shock of me being organised ;)

Monday, 19 August 2013

simple hexagon pattern

Hey well, you know how I like my hexagons :)
 I'm working on another blanket at the moment, a slow-growing, scrap-using kind of thing which I suspect will probably grow slightly more quickly come the Winter when I'm feeling cold and less distracted by outdoorsy type stuff, but I promised Jane the recipe so here it is* ;o)

I've used a 4.5mm hook and DK yarn. This produces hexagons approx. 7.5cm across at the widest point (but play around with different hooks/yarns for different size hexagons)
The pattern is in UK terms and uses chain (ch), treble (tr) and half treble (htr) stitches.

chain 4 and join with a slip stitch in the first chain to form a ring
chain three (to act as first treble of first round)
work 11 tr into the ring and join with a slip stitch into the third chain of ch3
 you should have ended up with 12 stitches.
 Round 2 : this round will give you your hexagon shape and is worked in half trebles.
Chain 2 and work one htr into the same stitch. ch1. Work 2htr into the next tr of previous round. ch2. Work 2htr into the next tr of previous round. ch1.
 continue working 2htr into each tr of previous round separating clusters (of 2htr) with ch2 and ch1 alternately (ch1 on straight edges, ch2 for corners) ending on a ch2
Join with slip stitch into second chain of initial ch2
 ch3 (acts as treble) work 2tr into next ch space of previous round. work 2tr into next 2ch space (corner from previous round) chain 2 and work another 2tr into SAME 2chspace.
repeat around working 2tr in each straight edge chain space from previous round and [2tr,2ch,2tr] in each corner space.
on the last corner you will already have your initial 3ch acting as the final treble, so just [2tr,2ch,1tr] in that corner and join with a slip stitch into third chain of initial ch3.
 !!!TA DA!!!
 make lots
☺☻☺☻☺☻☺
*I've written this up a bit quickly and haven't had anyone test my instructions yet, so if anything seems wrong with it or is unclear, please let me know and I will fix it or try and clarify it for you

Saturday, 16 March 2013

wee chookie birdie (PATTERN!!)

# wee chookie birdie
trill-lil-lil
laid and egg on the windowsill...

my family will get that reference even if no-one else does ;-)

As with all my patterns, please only use them to make items for your own use or for charities, please do not use my patterns to make items to sell for your own profit.

I used a 3.5mm hook for this pattern and dk yarn and the pattern is in UK terms. 
I tend to crochet quite closely and this forms a good fit for a Creme Egg size egg. If you crochet more loosely, you may need to adjust the number of stitches for the body.

HEAD
Chain 2 and work 10dc into the 2nd chain from the hook, finish with a slipstitch into the top of first dc.
(The rest of the head is worked in a spiral but you will need to keep on eye on where each round of the spiral starts for the next few rounds.)
Chain one, 2dc into each of next 9dc of previous round. Then, 1dc into each stitch of previous round for two rounds.
Continue working in a spiral but now decrease every fourth stitch until you have about eight stitches left. Stuff and sew closed to form a ball.

BODY
Chain 33. turn and work one dc into each chain.
(You are going to be decreasing on each row so omit the usual 'chain 1' from the start of each row when you turn - this also forms the taper shape for the tail)
turn (NO CHAIN) starting in second stitch from hook, 5dc, 21htr, 5dc
turn (NO CHAIN) starting in second stitch from hook, 5dc, 20htr, 5dc
turn (NO CHAIN) starting in second stitch from hook, 5dc, 19htr, 5dc
turn (NO CHAIN) starting in second stitch from hook, 5dc, 18htr, 5dc
turn (NO CHAIN) starting in second stitch from hook, 5dc, 17htr, 5dc
turn (NO CHAIN) starting in second stitch from hook, 5dc, 16htr, 5dc
You should end up with a shape something like this...
fold in half and crochet or sew together along tail end and top...
...and turn inside out...
Stitch head to body...
and add beak and eyes...
all done!
☺☻☺☻☺☻☺☻☺


Monday, 4 February 2013

PATTERN!! : pinwheel square

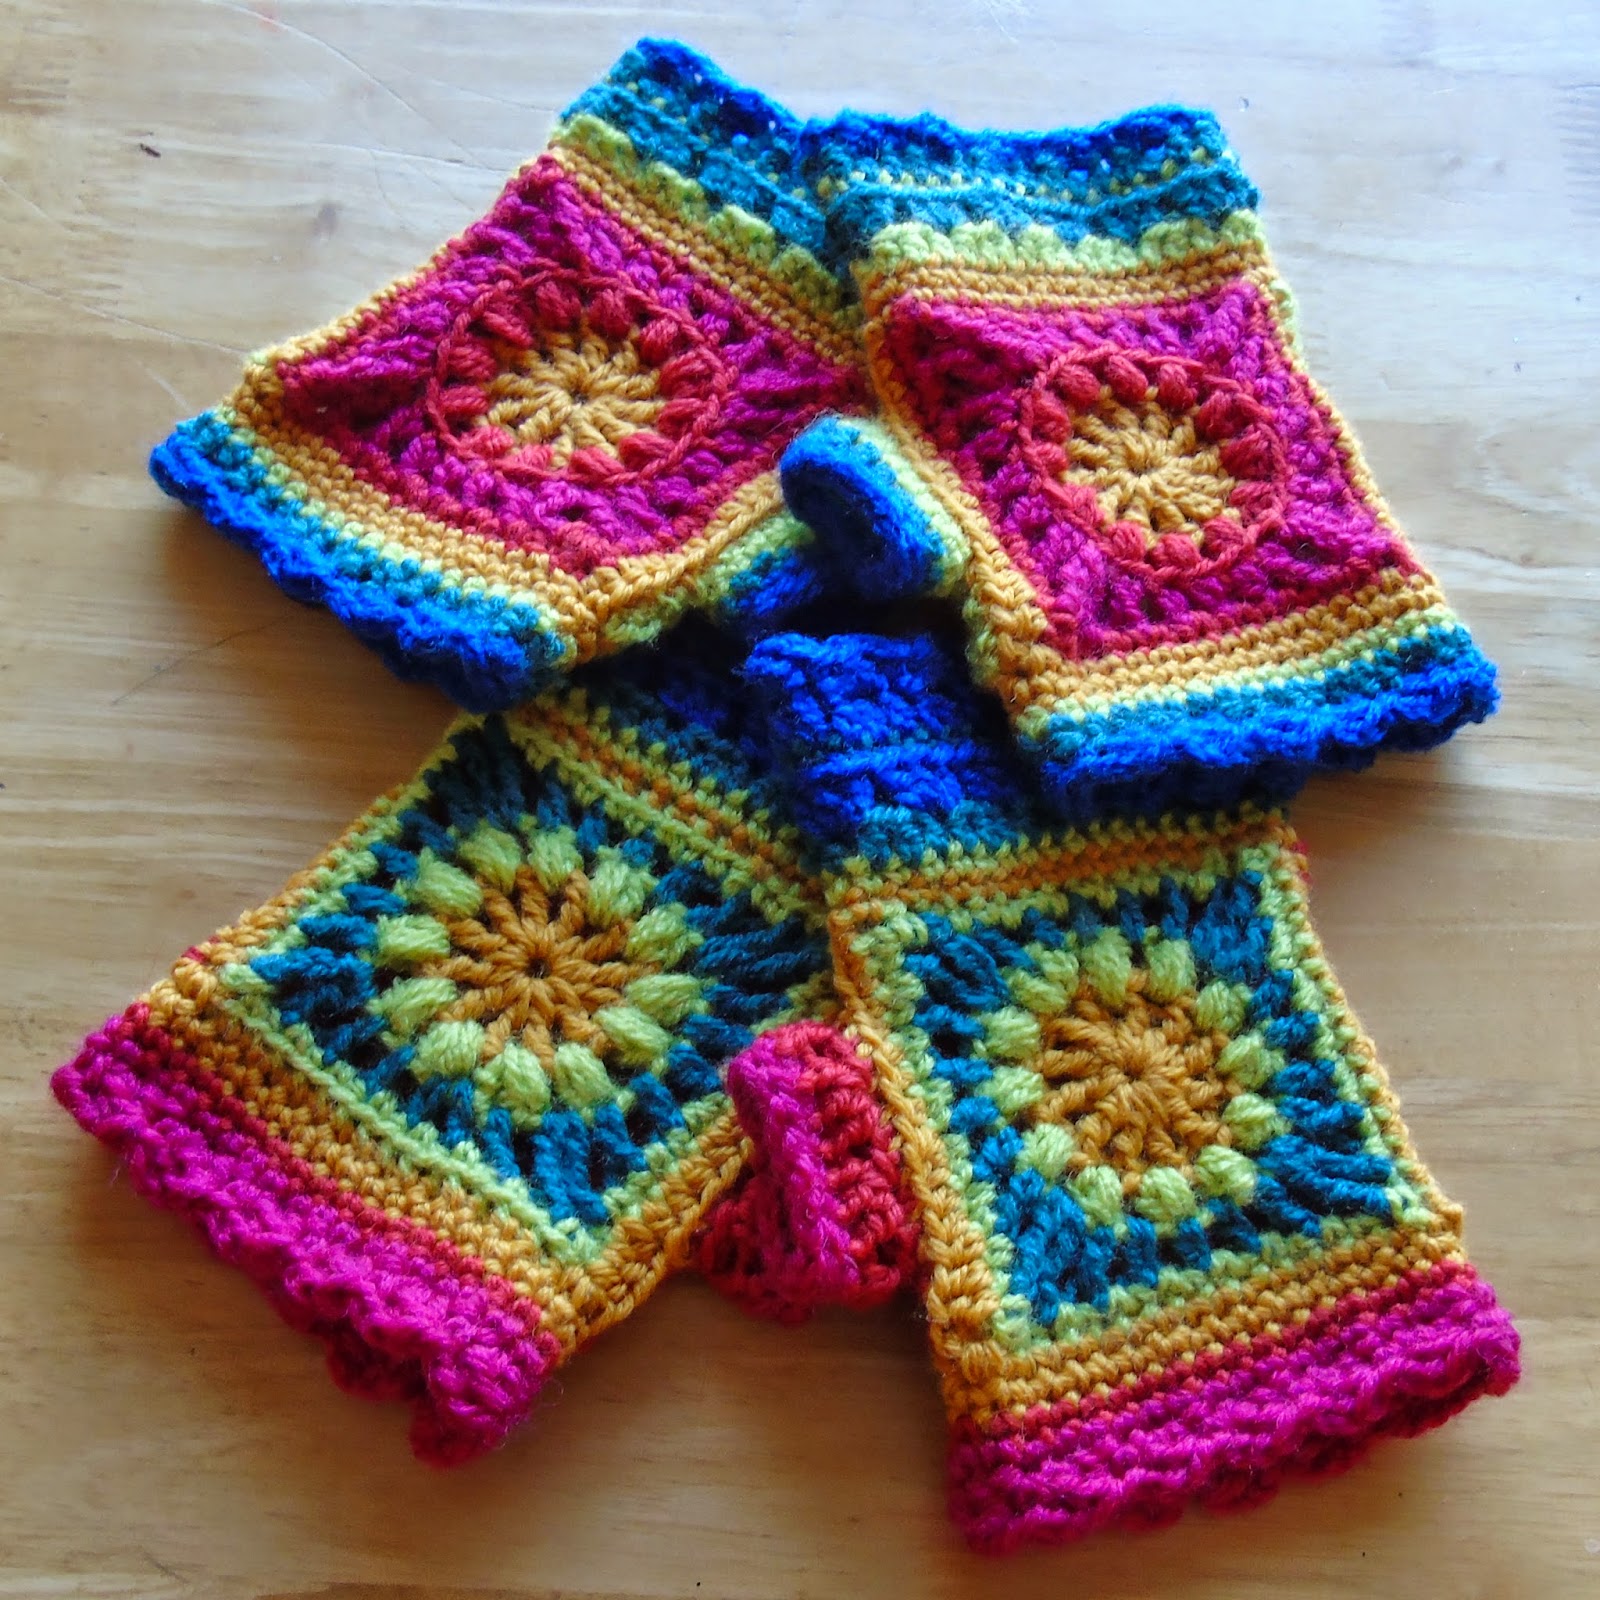
My sister gave me some dog chewed cushions a few months ago for me to 'do something creative with', so I'm working on some new covers for them...this is my favourite (not quite finished yet)...
...and thought I'd share the pattern with you :)
The pattern is just for the individual pinwheel square. Obviously, to make the whole panel, make more of them and sew them together and edge with rounds of doubles, trebles etc to the required size! ;-)

This pattern is in UK terms and uses ss = slip stitch, ch = chain, dc = double crochet, htr = half treble, tr = treble crochet.
Using DK yarn and a 5mm hook made a 5inch square.

Please use the pattern for your own use only and not for items you intend to sell. Thankyou 
:-)

PINWHEEL SQUARE

FOUNDATION RING: Yarn A : work 6ch and join with ss to form a ring.

ROUND 1: Yarn A : 1ch, 16dc into ring, join with ss into first dc. (16stitches)
ROUND 2: Yarn A : 2ch (counts as 1htr), 1htr into same place, 1htr into next dc, [2htr into next dc, 1htr into next dc] 7 times, join with ss into 2nd of 2ch. (24 stitches)
ROUND 3 : Yarn A : 3ch (counts as tr1), 1tr into each of next 2htr of previous round, 2ch, [1tr into each of next 3htr, 2ch] 7 times, join with ss into 3rd of 3ch. Break off Yarn A.
ROUND 4 : Yarn B : join yarn B to any 2ch space, ch1, 3dc into same space, 3ch, [3dc into next 2ch sp, 3ch] 7 times, join with ss to first dc. ss through each of next 2dc into 3ch sp.
ROUND 5 : Yarn B : (starting in 3ch sp of previous round) ch3 (counts as 1tr)[2tr, 3ch, 3tr] into same space, 2ch, miss next 3dc, 3dc into next 3ch sp, ch2, miss next 3dc, *[3tr, 3ch,3tr] in next 3ch sp, miss 3dc,  2ch, 3dc in next 3ch sp, 2ch miss next 3dc; rep from * twice, join with ss into 3rd of 3ch. Break off Yarn B.
ROUND 6 : Yarn A : join yarn A to any 3ch corner sp, [1ch, 1dc, 3ch, 1dc] into same space, 3ch, miss next 3tr, [1dc into next 2ch sp, miss next 3tr, 3ch] twice, *[1dc, 3ch, 1dc] into next corner sp, miss next 3tr, 3ch, 1dc into next 2ch sp, miss next 3tr, 3ch, 1dc into next 2ch sp, miss next 3tr, 3ch; rep from * twice, join with ss to first dc. Break off Yarn A.
ROUND 7 : Yarn B : join yarn B to any 3ch corner sp, ch3 (counts as 1tr), [2tr, 3ch, 3tr] into same sp, [1ch, miss 1dc, 3tr into 3ch sp] 3 times. *1ch, [3tr, 3ch, 3tr] into next corner sp, [1ch, miss 1dc, 3tr into 3ch sp,]3 times; rep from * twice, 1ch, join with ss to 3rd of 3ch. Break off Yarn B.
ROUND 8 : Yarn A : join yarn A to any tr of previous round, 1ch, 1dc into each tr and each 1ch sp of previous round, working [2dc, 2ch, 2dc] into each 3ch corner space. Break off Yarn A.

The pattern has been tested (BIG thankyou to helpful friend :)) 
but I'd love to hear how you get on with it and please do let me know if you have any problems with any of it :)

Monday, 20 February 2012

Five petalled flower pattern

 I wanted to make some flowers to decorate my hanging rail with when I do markets. In my head I know exactly what I want them to look like, but I couldn't find a pattern anywhere that I liked, so I had a go at making one up.
They're not exactly what I want, but they're pretty close. There probably are lots of patterns for similar flowers out there already, but I thought it would be good practice to have a go at writing a pattern out, so please do have a go and give me your feedback on how clear (or not!) my instructions are :-)
(and please excuse the not very well focussed photos!)
UK terms and I used a 4.5mm hook with dk yarn which makes a flower approx. 7cm diameter.

Please use the pattern for your own use only and not for items you intend to sell. Thankyou 
:-)

Round 1 : Yarn1 - chain three (a) and then work nine htr's into the third loop from the hook (loop next to knot)(b)(c) to end up with a circle of ten stitches (d) break off yarn 1.
Round 2: Yarn two - attach yarn two (e) and ch 2 into 1st stitch, htr into same stitch, ch1; *2 htr, 1ch into next stitch* (f); repeat ** in next eight stitches and sl st into top chain of first ch 2 to complete the round (g). break off yarn 2 (h)
Round 3: Yarn 3 - attach yarn three (i) and ch2 in first ch 1 space of previous round (j); slst into next ch 1 space; ch 2 and slst into each ch 1 space (k) ending with a sl st in the space you began from (l) 
(don't break off yarn 3 as you will be using for the next round too)
Round 4: petals (Yarn 3) - each petal is worked in two halves over two of the ch 2 spaces from the previous round - into first ch 2 space (m) work 1 dc, 1 htr, 1 tr and 1 dtr (n), then working into the next ch 2 space work 1 dtr, 1 tr, 1 htr and 1 dc (o), this gives you one full petal; repeat for the remaining four petals (p)
I think the flower looks quite sweet as it is at this stage, but I wanted mine outlined in a contrasting colour. You could leave it here though, or continue Round 5 with the same colour as the rest of the petal if you didn't want the outline edge.

Round 5: Yarn 1 - attach Yarn 1 and begin with a long sl st (ie. insert hook into one of the ch 1 spaces of round 2 (q); pull yarn through (r); and secure with a slip stitch (s); 1 dc into each of next seven stitches (t)
Work one long dc into the 1ch sp of Round 2 (u)(v); and work 1 dc into next seven stitches again. Repeat for each petal (w). make more (x) ;-)